Email Reports
Want to share your reports or quick lists with team members who aren't Members of your Blue Cat account or maybe not even Trello users? With our email reporting capabilities you can do just that for any dashboard or quick list you have created in Blue Cat Reports.
Setting up Scheduled Email Reports
Once you have created your dashboards or quick lists and want to share them with your colleagues or team members, setting up scheduled email reports will allow you to share your reporting data with them on a scheduled timeline so you won't forget.
- From your dashboard/quick list, select the "Email" icon from the top right corner.
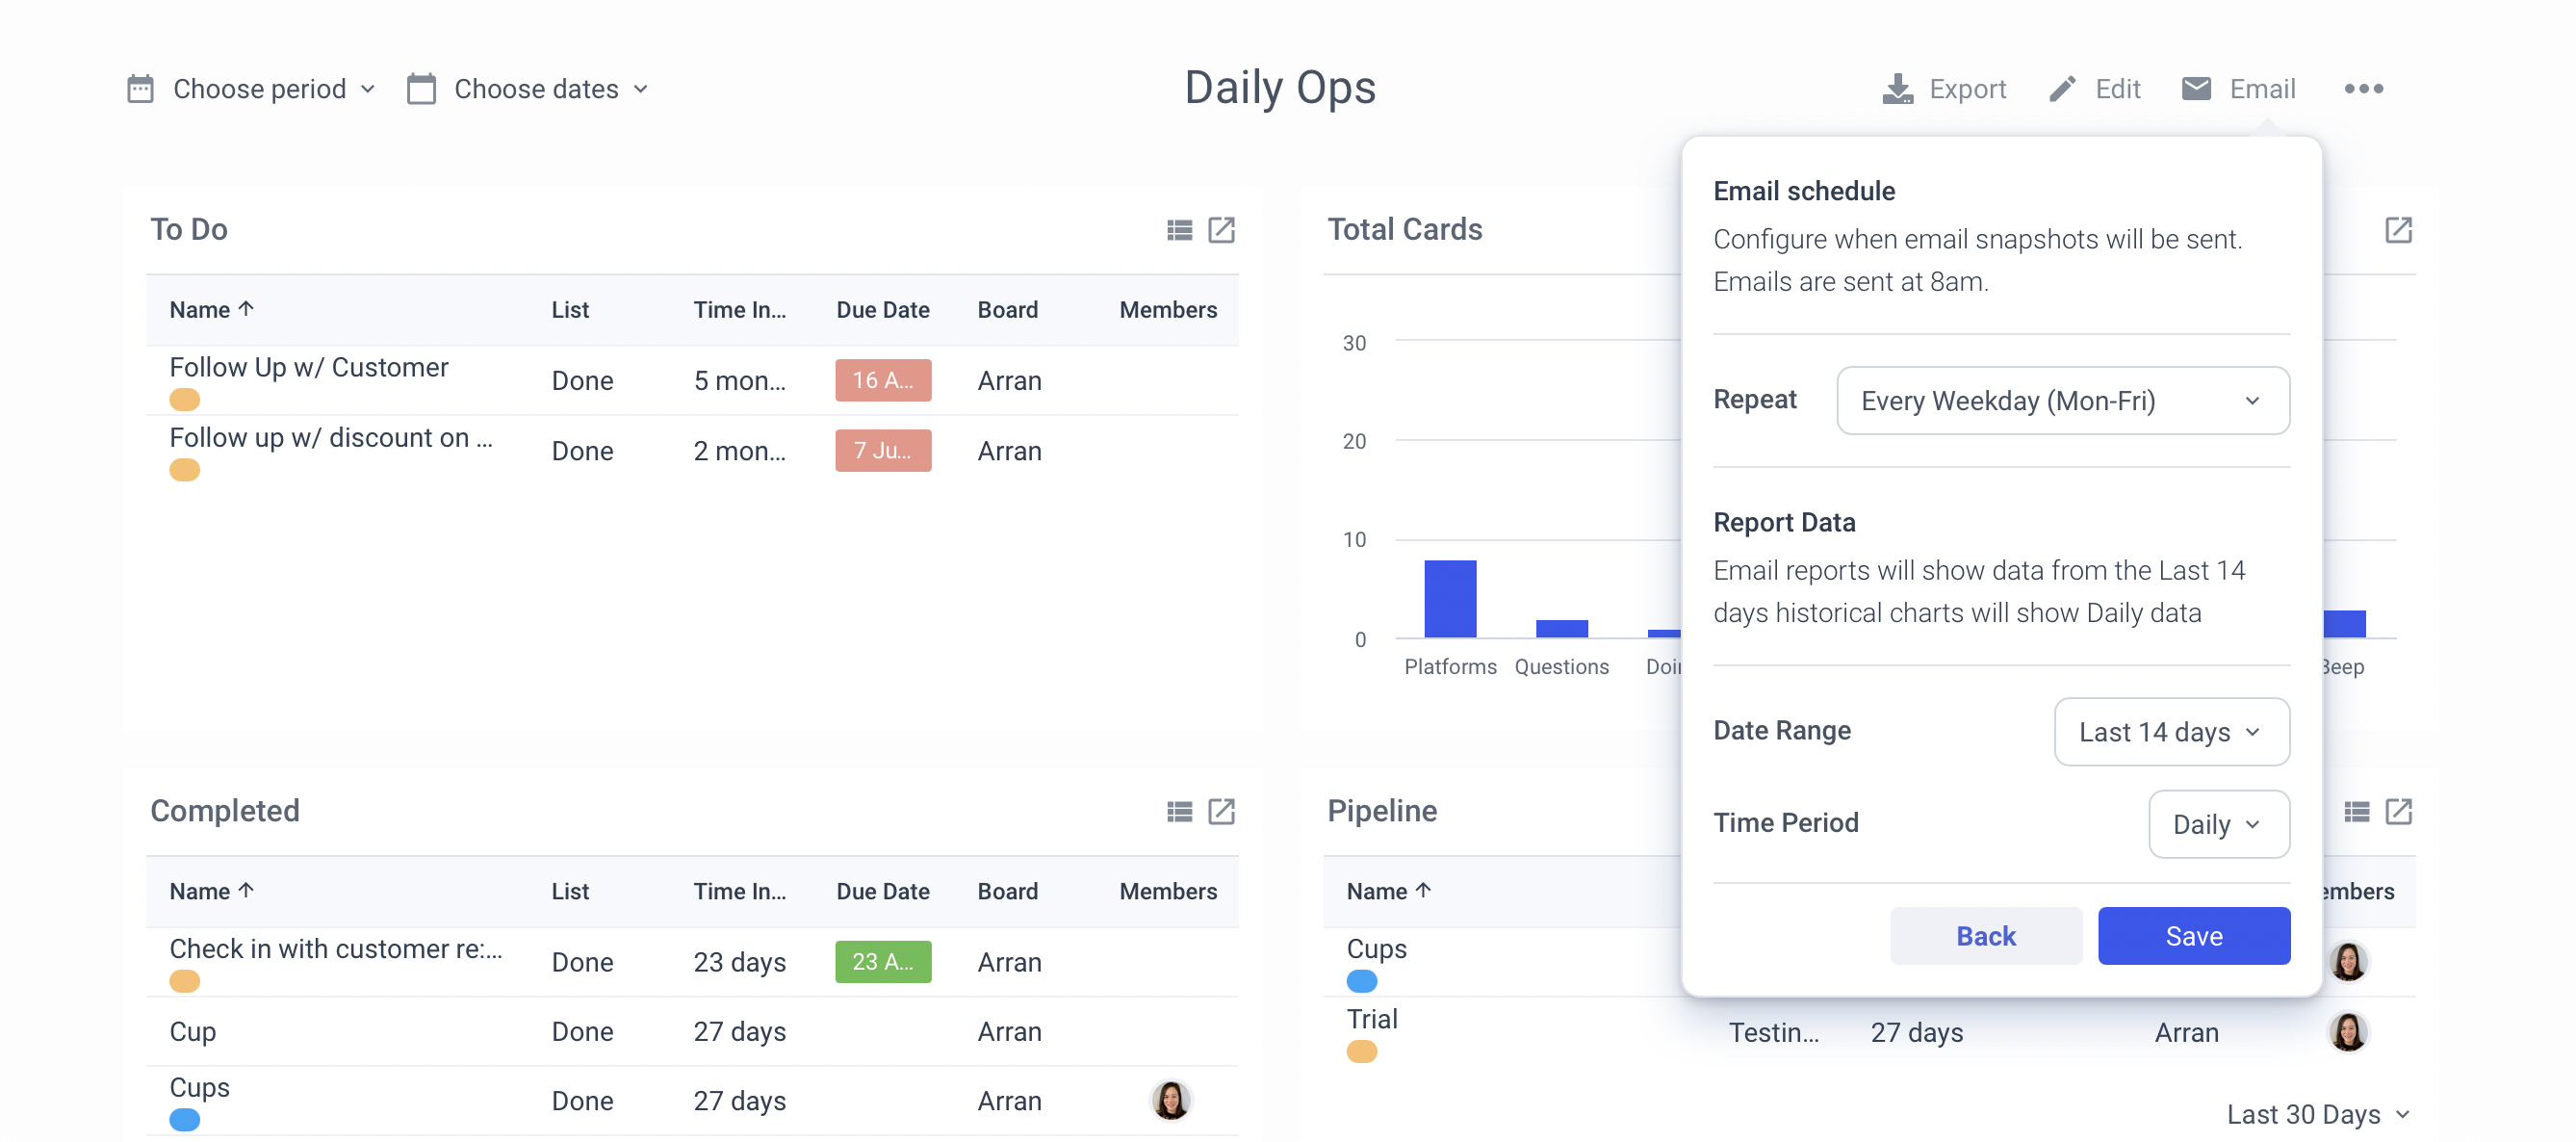
- Set your email schedule.
- Every Weekday (Mon-Fri) - this will send an email every weekday from Monday to Friday.
- Every Weekday (Sun- Thurs) - this will send an email every weekday from Sunday to Thursday.
- Every Week - this will send an email once a week on the day that you select.
- Every Month - this will send an email once per month for the following options:
- 1st of the month
- Last day of the month
- 1st Sunday of the month
- 1st Monday of the month
- Last Thursday of the month
- Last Friday of the month
- For Reports - Select the data range and time period you would like displayed in the report. This will remain the same every time the report is sent out and may be different than how you have your report configured for daily viewing from within your specific report dashboard.
- Hit "Save" to continue.
- Select "Subscribe by Email" to enter the email addresses of the individuals you would like included in this email schedule. Or you can select "Subscribe Me" to subscribe yourself using the email address you used to set up your Blue Cat account. You can enter as many email addresses as you would like.
After you've finished:
Once you are done setting up your scheduled emails you can do the following...
- Change the email schedule - Select the "Email" button and select "Configure Schedule" to make modifications to your selections.
- Remove users from the schedule - Select the "Email" button and use the trash can icon beside users names to remove them from the schedule.


